Key Takeaways
- Ear training helps you play music just by listening.
- Intervals are the steps between notes (like “Happy Birthday”).
- Solfege (Do-Re-Mi) gives names to musical sounds.
- Active Listening means focusing on one instrument at a time.
- Singing is the best way to prove your ears are working.
What is Ear Training?
Ear training is a practice used by musicians to identify pitches, melodies, chords, and rhythms solely by hearing them. It builds Relative Pitch, which is the ability to recognize how high or low a note is compared to another note. Think of it as learning a language, but instead of words, you are understanding sounds.
Why Your Ears Need the Gym
Imagine you are trying to catch a ball. You don’t need to measure the wind speed or do math on paper to catch it. Your brain just knows where your hand should go.
Ear training does the same thing for music. When you hear a song on the radio, ear training helps your brain say, “Hey, that’s a C Major chord!” without looking at a book.
Here are the benefits of ear training:
- Play songs by ear without sheet music
- Sing in tune and harmonise with others
- Improvise confidently on your instrument
- Compose and arrange music more naturally
- Improve mixing and production skills (frequency training)
For a deeper dive, see this overview of aural skills in music education.
The Physics of Sound and Frequency
Music is fundamentally a branch of psychoacoustics. Sound is produced by vibrations that create pressure waves in the air, measured as Frequency in Hertz (Hz).
- Pitch Correlation: A higher frequency results in a higher perceived pitch.
- The Octave Principle: Human hearing perceives pitches as “the same” when their frequencies are doubled or halved. For example, the standard orchestral tuning note A4 is 440 Hz. The note one octave higher, A5, is exactly 880 Hz (440 Hz × 2 = 880 Hz).
Understanding these mathematical ratios helps the brain categorize sounds into the Western 12-tone system more efficiently.
Two Types of Ears: The Natural and the Trained
Before diving into ear training techniques, it’s important to understand that not everyone starts from the same point. Generally, there are two kinds of people when it comes to recognizing musical pitch:
1. The Naturally Gifted Ear
Some people seem to be born with it. They can instantly identify or reproduce musical notes without effort — this is known as perfect pitch. Others may not have perfect pitch but still have a strong natural sense of relative pitch, meaning they can easily recognize melodies, intervals, and harmonies just by listening.
These people often develop their skills early, sometimes without even realizing it.
2. The Trained Ear
Most musicians fall into this group — and that’s completely fine!
They may not have a natural ability to recognize pitch right away, but through consistent ear training, they develop excellent listening accuracy over time.
With the right practice, a trained ear can become just as sharp as a natural one. Ear training isn’t about talent — it’s about developing awareness and building musical memory through repetition and focus.
10 Ear Training Techniques
Technique 1: Pitch Matching
Before we learn chords and intervals, let’s start with the most basic ear training skill: pitch matching.
Pitch matching means listening to a note and then trying to sing or play the same note back. This exercise trains your ear to be more accurate and helps you develop better control over your voice or instrument.
How to Practise Pitch Matching
Step 1: Play a Note
- Use a piano, keyboard, recorder, or even an app that plays notes.
- Start with middle C (C4) note.
Step 2: Hum or Sing the Note
- Play the note C and hold it for at least 3 seconds.
- Use your voice to sing along as you play the note C.
- Don’t worry if it feels strange at first — your ear will improve with practice.
Step 3: Check Accuracy
- Play the note again.
- Compare your voice with the piano and check if it blends.
- If it sounds “clashy” or “off,” adjust your pitch higher or lower.
Step 4: Repeat with New Notes
- Move upward note by note:
- D4
- E4
- F4
- G4
- For each, play → sing → check.
- Hold the note for about 3–5 seconds and try to keep it steady.
Step 5: Expand the Range
- After you are confident with C–G above middle C, try:
- Lower notes: B3, A3, G3 (below middle C).
- Higher notes: A4, B4, C5.
- Work slowly — don’t strain.
Start simple: listen to a note and sing or play it back. This exercise trains accuracy and sharpens your sense of pitch.
Technique 2: Learn Solfege (Do-Re-Mi System)
Solfege is a musical system that assigns syllables to each note of a scale. It helps your ear recognize pitch, melodies, and intervals, making it much easier to play music by ear. Solfege is also called Tonic Solfa.
The basic major scale in solfege looks like this:
| Note | C | D | E | F | G | A | B | C |
|---|---|---|---|---|---|---|---|---|
| Solfege | Do | Re | Mi | Fa | Sol | La | Ti | Do |
| Short | d | r | m | f | s | l | t | d |
Technique 3: Interval Recognition With Solfa
An Interval is the distance between two notes. It is like the distance between two houses on a street. The best way to learn them is to match them with songs you already know.
- Major 2nd: Sounds like the start of “Happy Birthday.”
- Major 3rd: Sounds like “When the Saints Go Marching In.”
- Perfect 4th: Sounds like “Amazing Grace” song.
- Perfect 5th: Sounds like “Star Wars” theme song.
How to Play and Sing a Major 2nd on Piano (with Solfa)
- Start by choosing any note as Do (d).
- To make things easy, let’s pick C as our Do.
- From C, move up two semitones — that means pressing the next key twice (count both white and black keys).
- You’ll land on D, which is Re (r).
The distance from C (Do) to D (Re) is a Major 2nd interval.

If you apply the same idea to any other note, you’ll get the same result:
- Pick a new Do → move up two semitones → you’ll always land on Re for that key.
Example:
- If D is Do, two semitones up is E (Re).
- If F is Do, two semitones up is G (Re).
This works for every key on the piano.
Now sing it:
- Sing “Do–Re” (d–r) while playing C–D.
- Make sure your voice moves smoothly up the small step.
Major 2nd Song Examples (d–r):
- “Happy Birthday” — the first two notes (“Birth-day”).
- “Jingle Bells” — the opening (“Jin-gle”).
- “Frère Jacques” — the first step up (“Frère”).
- “Row, Row, Row Your Boat” — the opening (“Row your”).
- “Silent Night” — the very first two notes.
Table showing possible Major 2nd Intervals
| From → To | Solfa | C Major Example |
|---|---|---|
| d → r | d – r | C – D |
| r → m | r – m | D – E |
| f → s | f – s | F – G |
| l → t | l – t | A – B |
How to Play and Sing a Major 3rd on Piano (with Solfa)
- Choose any note as Do (d).
- To make it easy, let’s use C as Do.
- Play C, then move up four semitones — that means pressing the next key four times (count all white and black keys).
- You’ll land on E, which is Mi (m). Play it.

Now sing it:
- Sing “Do–Mi” (d–m) while playing C–E.
- Listen for the sound: it’s a bright, open interval.
Apply the idea to any other note:
- Choose a new Do → move up four semitones → that new note is Mi for that key.
- Play the two notes and sing Do–Mi.
This is how you play and sing a Major 3rd interval anywhere on the piano.
Major 3rd Song Examples (d–m):
- “When the Saints Go Marching In” — the opening leap (“Oh when”).
- “Oh, Come All Ye Faithful” — the first interval (“Oh, come”).
- “Kumbaya” — the opening (“Kum-ba”).
- “Arms of an Angel” — the first leap (“She’s in the”).
- “Lean on Me” — the opening interval (“Lean on”).
Table Showing Major 3rd intervals
| From → To | Solfa | C Major Example |
|---|---|---|
| d → m | d – m | C – E |
| r → f | r – f | D – F |
| m → s | m – s | E – G |
| f → l | f – l | F – A |
| s → t | s – t | G – B |
| l → d ‘ | l – d | A – C (Octave) |
| t → r ‘ | d ‘ – m ‘ | C (Octave) – E (Octave) |
How to Play and Sing a Perfect 4th on Piano (with Solfa)
- Choose any note as Do (d).
- To keep it simple, let’s use C as Do.
- Play C, then move up five semitones — press the next key five times (count all white and black keys).
- You’ll land on F, which is Fa (f). Play it.

Now sing it:
- Sing “Do–Fa” (d–f) while playing C–F.
- Listen for the strong, stable sound of the interval.
Apply the idea to any other note:
- Choose a new Do → move up five semitones → that new note becomes Fa for that key.
- Play both notes and sing Do–Fa.
This is how to play and sing a Perfect 4th interval anywhere on the piano.
How to Play and Sing a Perfect 5th on Piano (with Solfa)
- Choose any note as Do (d).
- To make it simple, let’s use C as Do.
- Play C, then move up seven semitones — press the next key seven times (count all white and black keys).
- You’ll land on G, which is So (s). Play it.

Now sing it:
- Sing “Do–So” (d–s) while playing C–G.
- Listen for the strong, open sound — it’s one of the most important intervals in music.
Apply the idea to any other note:
- Pick a new Do → move up seven semitones → that note becomes So for that key.
- Play the two notes and sing Do–So again.
Song Examples of a Perfect 5th (Do → So)
These songs start with a Perfect 5th:
- “Twinkle, Twinkle, Little Star” — the first leap (“Twin-kle”).
- “Star Wars Theme” — the opening jump.
- “The Last Post” — opening notes (military bugle call).
- “Flintstones Theme” — “Flint-stones…”
- “Tomorrow” (from Annie) — the first leap (“The sun…”).
Perfect 5th Interval Table (Do → So in Each Position)
| From → To | Solfa | C Major Example |
|---|---|---|
| d → s | d – s | C – G |
| r → l | r – l | D – A |
| m → t | m – t | E – B |
| f → d’ | f – d’ | F – C (octave) |
| s → r’ | s – r’ | G – D (octave) |
| l → m’ | l – m’ | A – E (octave) |
| t → f’ | t – f’ | B – F# (octave)* |
Note: In C major, the natural 5th above ti (B) is F#, because the Perfect 5th must stay 7 semitones above.
How to Play and Sing a Major 6th on Piano (with Solfa)
- Choose any note as Do (d).
- Let’s use C as Do for simplicity.
- Play C, then move up nine semitones — press the next key nine times (count all white and black keys).
- You’ll land on A, which is La (l). Play it.
Now sing it:
- Sing “Do–La” (d–l) while playing C–A.
- Listen for the sweet, open sound — it’s one of the more “romantic” intervals.
Apply it to any other note:
- Pick a new Do → move up nine semitones → that note becomes La for that key.
- Play and sing Do–La.
Major 6th Song Examples (d–l):
- “My Bonnie Lies Over the Ocean” — the opening leap.
- “NBC Chimes” — the first interval.
- “The Entertainer” (Scott Joplin) — first note jump.
- “It’s a Small World” — opening leap.
- “Nobody Knows the Trouble I’ve Seen” — the first two notes.
Major 6th Interval Table (Do → La in Each Position)
| From → To | Solfa | C Major Example |
|---|---|---|
| d → l | d – l | C – A |
| r → t | r – t | D – B |
| m → d’ | m – d’ | E – C (octave) |
| f → r’ | f – r’ | F – D (octave) |
| s → m’ | s – m’ | G – E (octave) |
| l → f’ | l – f’ | A – F (octave) |
| t → s’ | t – s’ | B – G (octave) |
Technique 4: Octave Intervals with solfa
An Octave is the interval between a note and the same note 12 semitones higher. It’s like hearing the same note “in a higher voice.”
How to Play and Sing an Octave on Piano (with Solfa)
- Choose a starting note as Do (d).
- Let’s use C as Do.
- Play the note, then move up 12 semitones — that’s 12 keys up (count all white and black keys).
- You’ll land on C (one octave higher), which is also Do (d’). Play it.
Now sing it:
- Sing “Do–Do” (d – d’) while playing C – C (octave).
- Notice the bright, full sound of the octave — it’s like the same note but higher.
Apply it to any other note:
- Pick any Do → move 12 semitones up → that note is the higher Do.
- Play and sing Do–Do for that key.
Octave Song Examples (Do → Do’):
- “Somewhere Over the Rainbow” — the first and fifth note leap is often sung as an octave.
- “Over the Rainbow” (“Some-where”) — first note to high note jump.
- “The Alphabet Song” — jumps between low and high C in some versions.
- “Twinkle, Twinkle, Little Star” — in some lines, the leap is an octave (“Up above the world so high”).
Octave Interval Table (Do → Do’ in Each Position)
| From → To | Solfa | C Major Example |
|---|---|---|
| d → d’ | d – d’ | C – C (octave) |
| r → r’ | r – r’ | D – D (octave) |
| m → m’ | m – m’ | E – E (octave) |
| f → f’ | f – f’ | F – F (octave) |
| s → s’ | s – s’ | G – G (octave) |
| l → l’ | l – l’ | A – A (octave) |
| t → t’ | t – t’ | B – B (octave) |
Technique 5: The Radio Game (Active Listening)
Most of the time, we hear music like a big soup—all the ingredients mixed together. Active Listening is like tasting the soup and trying to find just the carrots.
How to do it:
- Put on a pop song.
- Ignore the singer.
- Try to listen only to the bass guitar (the low, rumbly sound).
- Follow it for the whole song.
Next time, listen only to the drums. This trains your brain to separate sounds.
6. Rhythm & Beat Training
Ear training isn’t just about melody and harmony — rhythm is equally important. Developing rhythmic accuracy helps you stay in time with others and perform music more confidently.
In music, a standard beat is often divided into 4 parts. We write this as a fraction:
4/4 Time Signature. Let’s look at the practical steps to build your ear training techniques on rhythms.
Step 1: Clap with a Steady Beat
- Use a metronome (start at 60 BPM).
- Clap once on every click.
- Make sure your claps line up exactly with the beat.
Step 2: Add Subdivisions
- Divide each beat into:
- Two claps per beat (eighth notes).
- Four claps per beat (sixteenth notes).
- Keep it steady without speeding up or dragging.
Step 3: Identify & Clap Back Rhythms
- Teacher (or app) claps a short 1–2 bar rhythm.
- Student listens carefully, then claps it back.
- Start simple, then add rests and ties.
Step 4: Practice Time Signatures
- Try clapping in:
- 2/4 (march feel)
- 3/4 (waltz feel)
- 4/4 (most pop music)
- Feel how the “strong beat” shifts depending on the meter.
Step 5: Introduce Syncopation
- Add off-beat claps (e.g., clapping on the “&” between beats).
- Helps train flexibility and groove awareness.
Step 6: Combine with Movement
- Step your feet on the beat while clapping rhythms with your hands.
- This builds a stronger internal sense of pulse.
👉 Related : Mastering Rhythm: Fun Activities for Beginners
👉 External Resource : Teoria Rhythm Ear Training Exercises
Technique 7: basic Chord Recognition
A chord is when you play three or more notes at the same time. These notes sound good together and give music its harmony.
Step 1: Understand What a Chord Is
The first chords you should learn to hear are the three main major chords in the key of C:
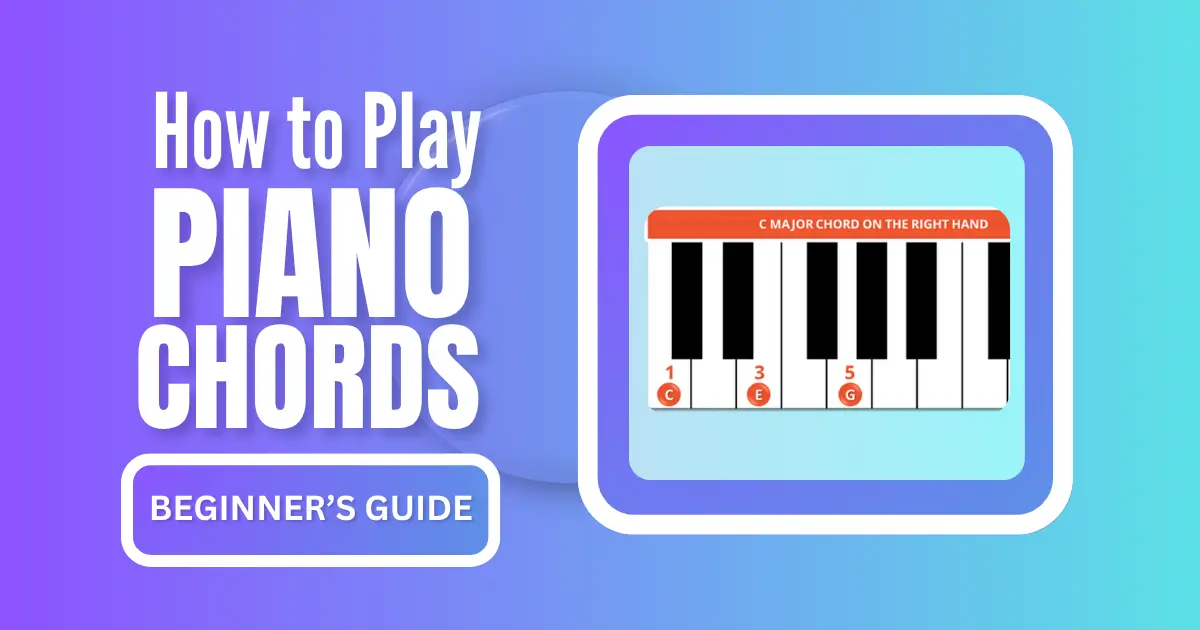
- C major (C–E–G)
- F major (F–A–C)
- G major (G–B–D)
These are called the primary chords. Most simple songs are built using them.
Step 2: Listen to One Chord at a Time
- Pick a chord (C major) and play it slowly.
- Say the notes out loud: “C–E–G”
- Hum the chord, feeling the sound.
- Pick another chord F or G Major.
- Close your eyes and ask someone (or use a chord app) to play C, F, or G.
- Try to guess which one it is.
Why: Your ear needs to internalize the sound of each chord before identifying it in songs.
Step 3: Work With Minor Chords
The basic minor chords are:
- A minor (A–C–E)
- D minor (D–F–A)
- E minor (E–G–B)
- Play A minor (A–C–E), D minor (D–F–A), or E minor (E–G–B).
- Notice they sound darker/sadder than the major chords.
- Say aloud: “Am is soft, Dm is gentle, Em is cool.”
- Close your eyes and ask someone (or use a chord app) to play Am , Dm or Em.
👉 Related: How to Play Piano Chords: The Ultimate Beginner’s Guide
Step 4: Recognize Chords in Songs
If you want to play songs by ear, one of the most powerful tools you can use is the Nashville Number System (NNS). It helps you understand chords by their function in the key, rather than memorizing every single chord. This makes it easier to identify chords in any song, in any key.
What is the Nashville Number System?
The Nashville Number System is a method of numbering chords based on the scale degree of the key:
- I (1) = tonic (home chord)
- ii (2) = supertonic (minor in major keys)
- iii (3) = mediant (minor in major keys)
- IV (4) = subdominant (major)
- V (5) = dominant (major)
- vi (6) = submediant (minor)
- vii° (7) = leading tone (diminished)
Example in C Major:
| Scale Degree | Chord Type | Notes | Nashville Number |
|---|---|---|---|
| 1st | Major | C–E–G | I |
| 2nd | Minor | D–F–A | ii |
| 3rd | Minor | E–G–B | iii |
| 4th | Major | F–A–C | IV |
| 5th | Major | G–B–D | V |
| 6th | Minor | A–C–E | vi |
| 7th | Diminished | B–D–F | vii° |
Play Two-Chord Progressions
Instead of one chord, now play two chords in a row. This trains your ear to hear how chords move together.
Here are some examples you can use:
- C → Am (happy to sad)
- F → Dm (happy to sad)
- G → Em (happy to sad)
- Am → F (sad to happy)
- Dm → G (sad to happy)
- Em → C (sad to happy)
Tip: Focus first on the root note (the lowest note in the chord). This often gives away the chord.
Step 5: Daily Practice Tips
- Start with 2–3 chords per day → major and minor
- Play and sing the chords simultaneously
- Use apps like Tenuto, Perfect Ear, or Functional Ear Trainer
- Gradually include 7th chords, suspended chords, and inversions
Pro Tip: Focus on feeling the chord rather than just naming it. Your ear will start associating sounds with emotions and functions, making it easier to play any song by ear.
TECHNIQUE 8: Harmonic Progression Recognition
Learning to recognise chord progressions strengthens your ear for harmony and helps you understand the “backbone” of most songs. Many pieces of music — from classical to pop — are built on simple, repeated chord patterns.
Step 1: Start with the Basics
- Listen to a progression
- Play the root notes first
- Then identify the full chord
- Play the I–IV–V–I progression in C major (C → F → G → C).
- Play it slowly on piano or guitar.
- Listen for how the chords “pull” towards home (C major).
The ear technique teaches your ear to predict the next chord, which is essential for playing by ear.
Step 2: Play, Sing, or Hum Along
- As the chords play:
- Try humming the root note (C, F, G, C).
- Then try to sing a simple melody above it.
Step 3: Recognize Common Progressions
- After I–IV–V–I, move to:
- I–V–vi–IV (very common in pop songs).
- ii–V–I (common in jazz).
- Play these repeatedly until the sound feels “familiar.”
| Progression | Example in C Major |
|---|---|
| I–IV–V | C–F–G |
| I–V–vi–IV | C–G–Am–F |
| ii–V–I | Dm–G–C |
Step 4: Use Real Songs
- I–IV–V–I: “La Bamba” or “Twist and Shout.”
- I–V–vi–IV: “Let It Be” (The Beatles), countless pop ballads.
- Hearing these in real music helps you connect ear training to songs you know.
Step 5: Practice With Apps
- Try an app like iReal Pro (for chord progressions) or Functional Ear Trainer to drill common harmonic patterns.
👉 External Resource : iReal Pro App for Practicing Progressions
Technique 9: Transcription (Writing It Down)
This sounds hard, but it’s easy to start.
- Take a simple nursery rhyme like “Mary Had a Little Lamb.”
- Draw three lines on a paper (High, Middle, Low).
- As you listen, put a dot where the note goes. Does it go up? Does it go down?
You are drawing the shape of the melody.
Technique 10: The Instrument Match
Pick up your instrument (guitar, piano, or kazoo).
- Hum a random note. “Hmmmmm.”
- Now, try to find that note on your instrument.
- Slide your finger until the sound matches your hum.
This connects your internal ear (what you hear in your head) to the external instrument.
What tools are best for independent ear training?
While a piano is a standard tool for reference, several high-quality digital resources exist:
- Mobile Apps: Functional Ear Trainer, Tenuto, and Perfect Ear.
- Software: iReal Pro for harmonic progression practice.
- Active Listening: Manually isolating specific instruments (e.g., the bass guitar) while listening to recorded music.
The “Human Lab” (My Experiment)
I wanted to see if I could learn a song without looking up the “tabs” (instructions). I chose the song “Twinkle Twinkle Little Star.”
- Day 1: I just mashed keys on the piano. It sounded terrible. I couldn’t find the starting note.
- Day 3: I used Technique 1. I realized the first jump in the song is a “Perfect 5th.” That gave me a clue!
- Day 7: I could play the melody perfectly.
The Result: By using intervals (math!) instead of guessing, I learned the song much faster. It felt like I unlocked a cheat code.

Interactive Knowledge Check
Let’s see if you are ready to train your ears!
1. Which interval sounds like the “Star Wars” theme?
A) Major 3rd
B) Perfect 5th
C) Minor 2nd
2. If a note vibrates at 200 Hz, what is the frequency of the note one octave higher?
A) 300 Hz
B) 400 Hz
C) 100 Hz
3. What is the “Home Base” note in Solfege called?
A) Re
B) Ti
C) Do
(Answers: 1:B, 2:B, 3:C)
FAQs
Q: Can I learn ear training if I am tone deaf?
A: Yes! True “tone deafness” is very rare. Most people just need practice matching what they hear to what they sing. It is a skill you can learn, like riding a bike.
Q: How long does ear training take?
A: If you practice for 5 or 10 minutes every day, you will hear a big difference in about one month. Consistency is more important than doing it for hours at a time.
Q: Do I need a piano for ear training?
A: No. You can use free apps on your phone, or just use your voice to sing along with the radio. Your voice is the best tool you have.
Q: Why is ear training important?
A: It helps you learn songs faster, write your own music, and play with other musicians without getting lost. It makes music more fun!
Q: Do I need perfect pitch for ear training?
No — relative pitch is more important for most musicians and can be developed.
Q: Can ear training help me play by ear?
Yes — as you improve, you’ll naturally be able to figure out songs without sheet music.
Q: Are apps effective?
Absolutely. They provide instant feedback and structured drills.
Q: Is ear training only for advanced musicians?
Not at all. Beginners often benefit the most, since it accelerates learning.
external Resources
Final Thought
Ear training is a skill anyone can develop with practice. By using these 10 techniques consistently, you’ll soon hear music in a new way — whether that means singing in tune, improvising confidently, or mixing tracks with sharper precision.
Start small, stay consistent, and let your ears guide your musical growth.